Apache Airflow Integration with DataBricks.
The two coolest kids in class … I mean seriously … every other post in Data Engineering world these days is about Apache Airflow or DataBricks. It’s hard to kick against the goad. Just jump on the band wagon before you get left in the dust. I’ve used both DataBricks and Apache Airflow, they both are pretty important and integral tools for data engineers these days. Apache Airflow makes overall complex pipeline dependencies, orchestration, and management intuitive and easy. DataBricks has delivered with AWS and EMR could not, easy to use Spark and DeltaLake functionality without the management and config nightmares of running Spark yourself.
Recently I worked on an Airflow and DataBricks/DeltaLake integration, time to talk what it looks like and options when doing this type integration.
Airflow + DataBricks integration.
I’m going to focus on some of the basic steps and decisions that need to be made when integrating Apache Airflow with DataBricks ( running on AWS ). There isn’t a lot of rocket science when trying to integrate Airflow with DataBricks, but sometimes it helps to high level overview of what the options are, and quick ways to get the integration running so you can tweak it later.
Why would you need something like Apache Airflow to use with DataBricks?
Airflow has become the ubiquitous tool for data engineer’s wanting to orchestrate and manage complex data pipelines and ETL tasks. It’s a great tool that has a huge community backing with connectors to help integrate with every tool under the sun. Most pipelines these days aren’t usually made up of a single technology stack, so using Airflow to say run certain pieces of a pipeline, then kick off a DataBricks job on a cluster as just a step in that long process is very powerful.
High level integration steps.
- Airflow needs to have the community supplied DataBricks connector installed. The below would have to be part of your Airflow installation.
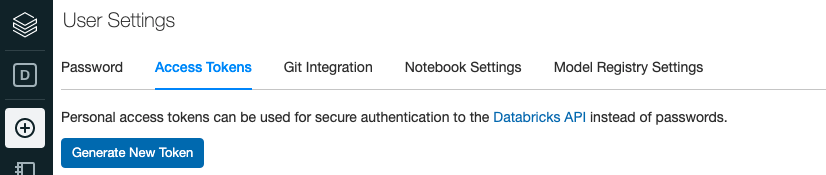
pip3 install apache-airflow[databricks]2. Obtain access token from DataBricks UI …. User Settings.
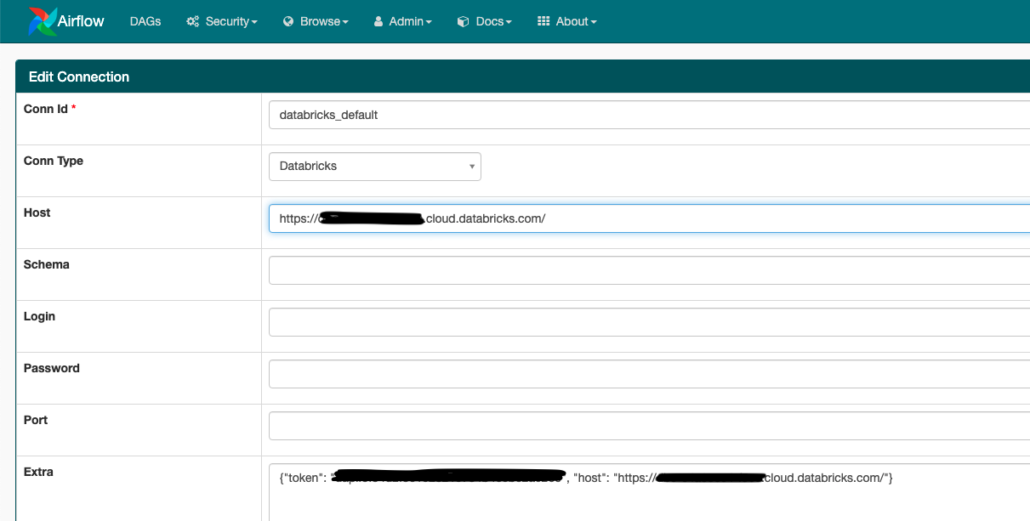
3. Go into the Airflow UI and find the default DataBricks connections.

4. Fill in the host (look in your browser uri) and token in the Airflow connection.
Once these simple steps are done you should have a good easy base from which you could write DAGs to interact with DataBricks.
Understanding Airflow DAG’s for DataBricks.
I will assume some knowledge of Airflow and DataBricks, but here is some high level for those who don’t have that.
When using infrastructure in DataBricks there are a few flavors you can pick from.
- create a Cluster and leave it up.
- run code via a Notebook attached to these long lives clusters.
- run a “job” which is specified by a cluster size and a script to run (it creates itself and tears itself down after)
Of course for most production work the DataBricks Jobs are going to make most sense. It’s always nice to have someone else clean up after you isn’t it. DataBricks also has an API which is enabling us to make these sorts of calls from Airflow over into our DataBricks environment.
What’s going to be of most interest to us for our Airflow DAG is something called the DataBricksSubmitRunOperator, see documentation here.
When it comes down to it there are only a really a few things you need when making a DAG to make a call to run a DataBricks job (create cluster …. run code … go away).
JSON to define …
- cluster version
- cluster size
- file to run
It’s really that simple. Here is an example.
from airflow import DAG
from airflow.contrib.operators.databricks_operator import DatabricksSubmitRunOperator
from airflow.utils.dates import days_ago
from airflow.models import Variable

default_args = {
    'owner': 'airflow',
    'depends_on_past': False,
    'email_on_failure': False,
    'email_on_retry': False,
    'retries': 0,
}

with DAG(
        dag_id='my_first_databricks_operator',
        default_args=default_args,
        schedule_interval=None,
        start_date=days_ago(1),
) as dag:
    my_cluster = {
        'spark_version': '8.2.x-scala2.12',
        'node_type_id': 'r3.xlarge',
        'aws_attributes': {'availability': 'ON_DEMAND'},
        'num_workers': 1,
        'spark_env_vars': {'AWS_SECRET_ACCESS_KEY': Variable.get("AWS_SECRET_ACCESS_KEY"),
                           'AWS_ACCESS_KEY_ID': Variable.get("AWS_ACCESS_KEY_ID"),
                           'AWS_REGION': 'us-east-1'}
    }

    task_params = {
        'new_cluster': my_cluster,
        'spark_python_task': {
            'python_file': 's3://some-wonderful-bucket/my_pyspark_script.py',
        },
    }

    first_databricks_job = \
        DatabricksSubmitRunOperator(task_id='my_first_job_job',
                                    json=task_params
                                    )

    first_databricks_job
Wa-la. Your first Airflow DAG that is capable of calling over into your DataBricks account and run a job based on a script you have stored in s3 somewhere. You will note in my example I’m passing AWS keys stored in an Airflow environment over into the ENVs for the DataBricks cluster so you can access things like s3. There are also options for using IAM roles to do such work that might work better and be more secure for production use.
Either way, it’s super easy and straight forward as you can see to get Airflow up and running with DataBricks in an AWS context. I think it’s great that the integration between these two top tier tools is so easy to use, that’s a powerful combination!