Deploying Apache Airflow inside Kubernetes.
Has anyone else noticed how popular Apache Airflow and Kubernetes have become lately? There is no better tool than Airflow for Data Engineers to built approachable and maintainable data pipelines. I mean Python, a nice UI, dependency graphs/DAGs. What more could you want? There is also no better tool than Kubernetes for building scalable, flexible data pipelines and hosting apps. Like a match made in heaven. So why not deploy Airflow onto Kubernetes? This is what you wish your mom would have taught you. It’s actually so easy your mom could probably do it….maybe she did do it and just never told you?
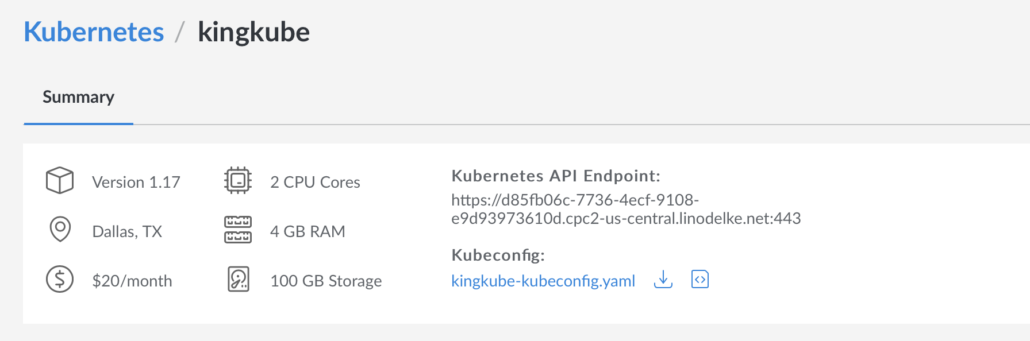
The first thing you will need is a Kubernetes cluster. I recommend using Linode, you can easily spin up a cheap cluster with the click of a button. Here is my $20/month cluster from Linode.
I’m going to assume you know something about Apache Airflow, I’ve written about it before. Simply put, an Airflow installation usually consists of a Scheduler, Airflow Workers, Web Server/UI, and optionally a Database. I’m going to assume you know something about Kubernetes. But what you may not know is how you can actually deploy something like Airflow inside Kubernetes.
Basics of Deploying Airflow inside Kubernetes.
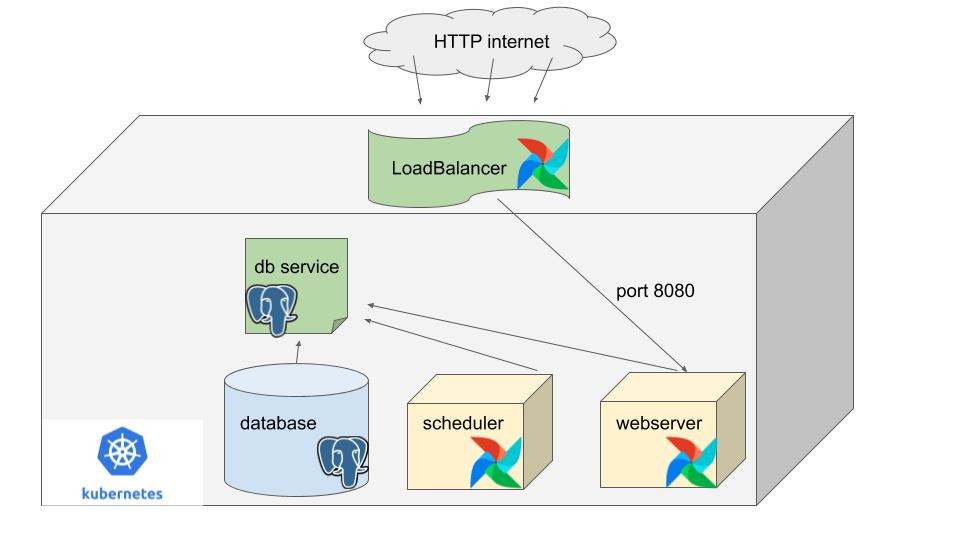
Referencing the first diagram you saw…. we are going to need the following containers running inside Kubernetes.
- Postgres Container
- Postgres Service
- Airflow Webserver
- Airflow Scheduler
- Airflow LoadBalancer Service
They’re a few obvious and not so obvious things about deploying any application inside Kubernetes if you haven’t done it much before.
- You deploy PODs inside Kubernetes that will run/host different “pieces” of an application.
- You use YAML files to describe the system you are trying to/will deploy onto Kubernetes.
- Kubernetes will require something called a LoadBalancer to accept/ingress/route HTTP/Internet traffic from the outside world to inside the Kubernetes cluster and eventually to your “application.” If you require such a feature. (if you want to use Airflow UI you will need this.)
- Deployed “applications”/PODs inside Kubernetes also will need a Service to communicate across nodes.
- PODs/containers running on Kubernetes are just Docker images running some command.
- You will need something called PersistentVolumes for Airflow to store its DAGs and Logs. (If a POD can come and go, crash etc, there is information you don’t want to lose.)
- If you expose your application via LoadBalancer to the Internet, there are bad people on the internet, plan accordingly.
Step-By-Step – How to deploy Airflow inside Kubernetes.
All this code is available on my GitHub.
Step 1. Get Apache Airflow Docker image.
The PODs running your Apache Airflow on Kubernetes will need a docker image. Up until recently that was pain, you would have to build your own or use Puckel… stinking Puckel (if you know what I’m talking about… you cool). Finally the Airflow community released an official Docker Image. The latest version can be obtained by running ….docker pull apache/airflow.
We should try to understand this Dockerfile and how it works if we plan to use it to run our Airflow inside Kubernetes.
If you run docker run -it docker.io/apache/airflow /bin/bash you will see an error that indicates that docker image is looking for a different command arg. Meaning when this POD runs on Kubernetes and the image is sent the “webserver” or “worker” command, that’ is what will airflow will run.
airflow command error: argument subcommand: invalid choice: '/bin/bash' (choose from 'backfill', 'list_dag_runs', 'list_tasks', 'clear', 'pause', 'unpause', 'trigger_dag', 'delete_dag', 'show_dag', 'pool', 'variables', 'kerberos', 'render', 'run', 'initdb', 'list_dags', 'dag_state', 'task_failed_deps', 'task_state', 'serve_logs', 'test', 'webserver', 'resetdb', 'upgradedb', 'checkdb', 'shell', 'scheduler', 'worker', 'flower', 'version', 'connections', 'create_user', 'delete_user', 'list_users', 'sync_perm', 'next_execution', 'rotate_fernet_key', 'config', 'info'), see help above.
Also, another question I had was would this Airflow image uses default configs (Airflow controls many setup options via a config file). So I would assume unless changed, Airflow would use sqlite as the database and not Postgres etc. Dropping in the image using `shell` seems to confirm this… docker run -it docker.io/apache/airflow shell

So, we have the official Apache Airflow Docker image, and we understand a little about how that image works. It requires certain commands to run our different pieces airflow scheduler or airflow webserver and the dang airflow initdb . (This last command setups up the database tables needed.)
Step 2. Deploy Postgres into Kubernetes
So this is the easy part. We need to get Postgres up and running inside Kuberentes. If you do a Google search for “postgres yaml kubernetes” this is a pretty common requirements and easy to find examples.
kind: Deployment
apiVersion: apps/v1
metadata:
  name: postgres-airflow
spec:
  replicas: 1
  selector:
    matchLabels:
      deploy: postgres-airflow
  template:
    metadata:
      labels:
        name: postgres-airflow
        deploy: postgres-airflow
    spec:
      restartPolicy: Always
      containers:
        - name: postgres
          image: postgres
          imagePullPolicy: IfNotPresent
          ports:
            - containerPort: 5432
              protocol: TCP
          volumeMounts:
            - name: dbvol
              mountPath: /var/lib/postgresql/data/pgdata
              subPath: pgdata
          env:
            - name: POSTGRES_USER
              value: airflow
            - name: POSTGRES_PASSWORD
              value: airflow
            - name: POSTGRES_DB
              value: airflow
            - name: PGDATA
              value: /var/lib/postgresql/data/pgdata
            - name: POD_IP
              valueFrom: { fieldRef: { fieldPath: status.podIP } }
          livenessProbe:
            initialDelaySeconds: 60
            timeoutSeconds: 5
            failureThreshold: 5
            exec:
              command:
              - /bin/sh
              - -c
              - exec pg_isready --host $POD_IP ||  if [[ $(psql -qtAc --host $POD_IP 'SELECT pg_is_in_recovery') != "f" ]]; then  exit 0 else; exit 1; fi
          readinessProbe:
            initialDelaySeconds: 5
            timeoutSeconds: 5
            periodSeconds: 5
            exec:
              command:
              - /bin/sh
              - -c
              - exec pg_isready --host $POD_IP
          resources:
            requests:
              memory: .5Gi
              cpu: .5
      volumes:
        - name: dbvol
          emptyDir: {}
Just a side note. Most people would probably deploy their USERNAME and PASSWORD for the Postgres instance inside some Kubernetes Secrets. I won’t do that in my example. Also make note or the containerPort that is being exposed. Once you have this saved YAML file postgres-airflow.yaml, and have your kubectl connected to your Kubernetes cluster, run this command to deploy the Postgres instance.
kubectl apply -f postgres-airflow.yaml
After running this, you should be able to run kubectl get pods and see your Postgres POD running.

Step 3. Deploy a Service for Postgres.
For Kuberetes PODS to talk to each other across Nodes you need something called a Service. It’s network magic to make sure other PODs can talk to your database/Service. Note the ports referenced in this below YAML. They would need to be the same as the port defined in your postgres-airflow.yaml file.
kind: Service
apiVersion: v1
metadata:
  name: postgres-airflow
spec:
  selector:
    name: postgres-airflow
  ports:
  - name: postgres-airflow
    protocol: TCP
    port: 5432
    targetPort: 5432
Again, running kubectl apply -f postgres-service.yaml will deploy the Service. Running kubectl get services should yield the results.

Step 4. Prepare Postgres database for Airflow.
Thought you were done? Not yet. Right now we have a empty Postgres database running, it needs all the Airflow tables setup. In general the steps we will follow to do this are….
- ssh into Kubernetes database Postgres POD.
- install pip3 onto that POD.
- use pip to install Python airflow package.
- export an ENVIRONMENT VAR telling Airflow to connect to our Postgres database.
- run
airflow initdbcommand that will setup and initialize the database.
So here we go. First, ssh into your Postgres POD, using the name found from kubectl get pods , in my case the command was…
kubectl exec --stdin --tty postgres-airflow-5878785456-2knp7 -- /bin/bash
Once into the pod…
Run apt-get update
Run. apt get install python3-pip
Then run the following command once pip3 is installed…
pip3 install \
 apache-airflow[postgres]==1.10.10 \
 --constraint \
        https://raw.githubusercontent.com/apache/airflow/1.10.10/requirements/requirements-python3.7.txt
Next we want to export the Environment Variable that Airflow will recognize that points to our default Postgres database.
export AIRFLOW__CORE__SQL_ALCHEMY_CONN=postgresql://airflow:airflow@localhost:5432/airflow
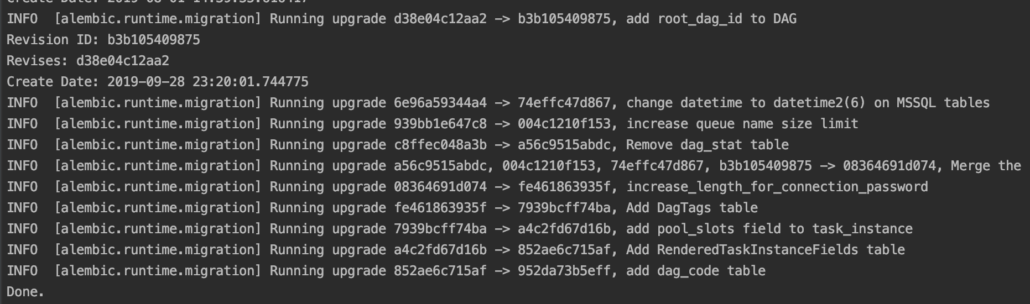
Now you can finally run the command which will setup all the database tables.airflow initdb
Please note again I’m using the USERNAME and PASSWORD I put into my postgres-airflow.YAML file…. airflow and airflow. Those are needed for the above ENV VAR. Also, remember in a Production setup you would want those values set in some Secret store.
Once airflow-initdb has been run, you should see a lot of output being printed to your STDOUT.
Step 5. Get ready to write some YAML files.
We are getting closer now. The next step is going to be to actually write out the “deployment” YAML file that we will submit to Kubernetes describing what we want. It will create our Airflow scheduler and webserver. It will make sense when you see it. You will want to make sure you use the same names/namespaces across all your YAML files so everything works.
But first, we need to create a ConfigMap that will hold our database connection, so our Airflow PODS don’t try to connect to the default SQLite database, but the Postgres instance we setup. kubectl apply -f airflow-configmap.yaml
apiVersion: v1
kind: ConfigMap
metadata:
  name: airflow-config
data:
  sql_alchemy_conn: "postgresql://airflow:airflow@postgres-airflow:5432/airflow"
  executor: "LocalExecutor"
The most important YAML file will be the Airflow deployment itself. You need two Airflow containers running…
- scheduler
- webserver
kubectl apply -f airflow-kubernetes.yaml
kind: Deployment
apiVersion: apps/v1
metadata:
name: airflow
spec:
replicas: 1
selector:
matchLabels:
deploy: airflow
template:
metadata:
labels:
deploy: airflow
spec:
containers:
- name: airflow-scheduler
env:
- name: AIRFLOW__CORE__SQL_ALCHEMY_CONN
valueFrom:
configMapKeyRef:
name: airflow-config # The ConfigMap this value comes from.
key: sql_alchemy_conn # The key to fetch.
- name: AIRFLOW__CORE__EXECUTOR
valueFrom:
configMapKeyRef:
name: airflow-config
key: executor
image: docker.io/apache/airflow
command: ["airflow"]
args: ["scheduler"]
- name: airflow-webserver
env:
- name: AIRFLOW__CORE__SQL_ALCHEMY_CONN
valueFrom:
configMapKeyRef:
name: airflow-config # The ConfigMap this value comes from.
key: sql_alchemy_conn # The key to fetch.
- name: AIRFLOW__CORE__EXECUTOR
valueFrom:
configMapKeyRef:
name: airflow-config
key: executor
image: docker.io/apache/airflow
ports:
- containerPort: 8080
command: ["airflow"]
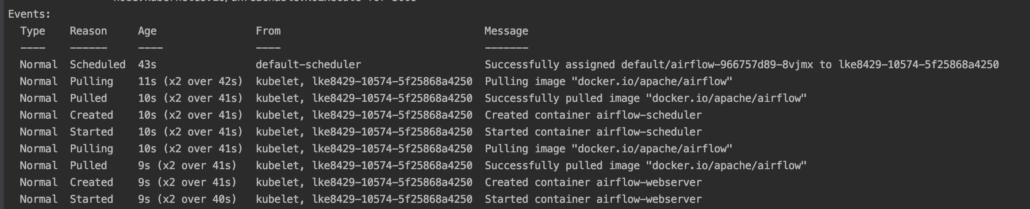
args: ["webserver"]
restartPolicy: AlwaysAfter completing this step you should be able to see the PODs/containers running. kubectl describe pods
Step 6. Deploy a LoadBalancer Service to expose Airflow UI to Internet.
DANGER DANGER! Once this step is complete you will have an Airflow UI that anyone can access. You should probably secure it and control the IPs that can hit it.
This is the LoadBalancer described above that will route Internet traffic, (good and bad) into our Kubernetes cluster and point that traffic at port 8080 which will be our Airflow UI.
kubectl apply -f airflow-service.yaml
kind: Service
apiVersion: v1
metadata:
 name: airflow
spec:
 type: LoadBalancer
 ports:
 - port: 8080
   protocol: TCP
   targetPort: 8080
 selector:
  deploy: airflow
kubectl get services airflow

kubectl describe service airflow
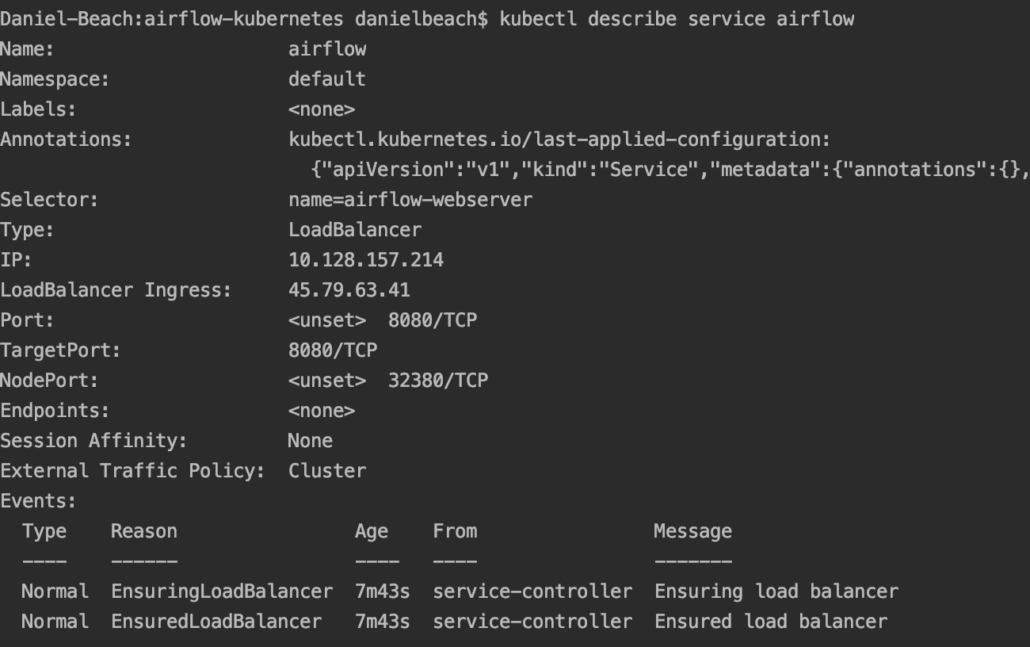
You should now be able to reach your Airflow UI via http://{LoadBalancer Ingress}:{Port} .
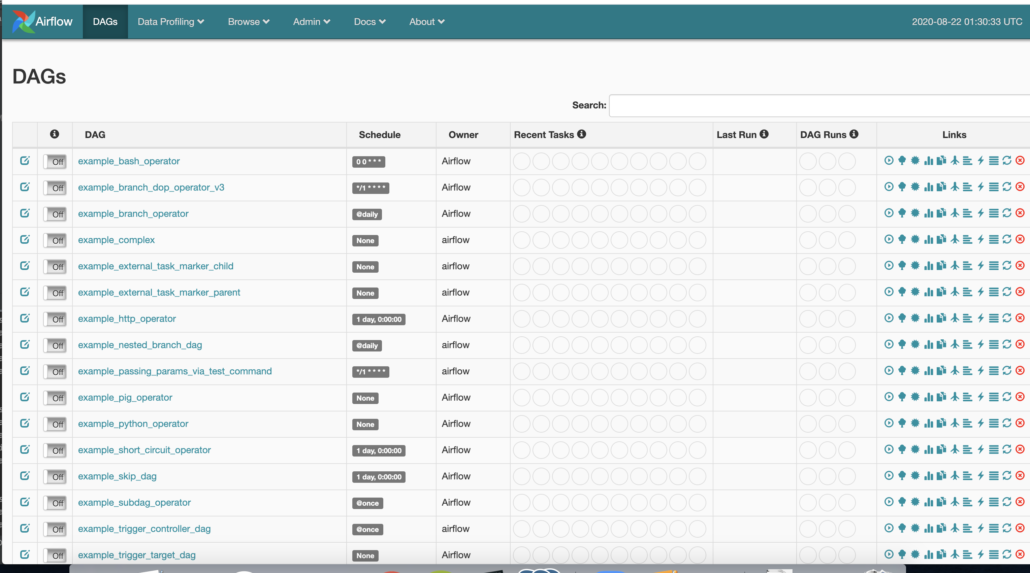
There you have it. You now have Apache Airflow deployed and running inside Kubernetes.