Look at my Hadoop Cluster… oh, and Don’t Sneeze.

I’ve been wanting to get more hands on experience with Apache Hadoop for a years. It’s one thing to read about something and say yeah… I get it, but trying to implement it yourself from scratch just requires a whole different level of understanding. There seems to be something about trying to solve a problem that helps a person understand the technology a little better.
So, a few weeks ago I decided to give Linode a try having heard about them on TalkPython for awhile now. Quick side-note, $5 bucks a month will get you a Nanode to play around with (1 GB RAM, 1 CPU 25 GB SSD). Three Linux Ubuntu nodes later and I was finally ready to give Hadoop a crack. The plan was a single Master node with two Worker data nodes to start.
I’m going to start by previewing why I picked Hadoop, and few key takeaways I came up with after finishing the project.
Why Hadoop?
- Open source.
- Data redundancy.
- High throughput of large data sets.
- Scales easily.
- Handle thousand up to millions of files.
Takeaways
- Don’t sneeze
- Know your way around Linux bash/command line.
- Research install and configuration before you start.
- Automate where possible.
Here are a few Hadoop basics from my point of view. Typically it is deployed as a cluster, with a Master to Worker(s) relationship. A file that is stored in HDFS is split into blocks that are stored across multiple nodes. (This gives you a hint as to one of the reasons Hadoop so powerful, and is core to the ideas behind HDFS.).
The first thing that I noticed when starting to work on this project is something obvious but I didn’t really consider it starting out. Automation. Before I even got around to installing and configuring Hadoop, just spinning up my base Linodes it quickly became apparent that running the same commands on every node, in my case 3, would quickly become brain numbing in a large Hadoop cluster. Things like hardening the servers, installing and configuring the firewall, setting up Java.
What did I mean by don’t sneeze? Well, for those system admins used to configuring systems and servers all day long, they know that the devil is in the details. The same is true in Hadoop. There isn’t really much in the way of installing the system, as much as configuring your cluster. Get one thing wrong and it will not work. Installation paths are important, naming conventions, it all has to be perfect. I found that out by experience. Also, I’m more of a Windows guy, but you will need to know your way around Linux bash pretty well. Remember some of the configurations will be specific to the size of your nodes, so figuring this out beforehand will be helpful. Again, automation, try not to do the same thing more than once.
Let’s get started. I had three brand new empty servers, after my initial hardening this is what I did. Obviously this will allow me to get Java and wget to download files from the web, and vim to edit those files.
apt-get update
apt-get install openjdk-8-jdk
apt-get install wget
apt-get install vim
The next lines will get me Hadoop and unpack, as well as move it to a folder called hadoop.
wget https://archive.apache.org/dist/hadoop/core/hadoop-2.7.3/hadoop-2.7.3.tar.gz
tar -xvf hadoop-2.7.3.tar.gz
mv hadoop-2.7.3  hadoop
Also, you need to gather your IP addresses and names of the nodes. This is because on each node, the .hosts files found in the /etc folder needs to be updated so the nodes can all talk to each other.
vim .hosts
45.xx.xx.xxx node-master
23.xx.xx.xx worker01
45.xx.xx.xxx worker02
Also, the nodes will talk to each other via SSH. We don’t want password restricted SSH, so we will want to generate keys to so we can have password-less SSH. (everything from here on out is done on Master node and will be replicated to the nodes.). If your not familiar with keys in Linux, do a little reading, it’s pretty straight forward. This id_rsa.pub must be copied to the other nodes, manually or otherwise.
ssh-keygen -b 4096

At this point we should test if we can ssh into the worker nodes from the master. You would do this by something like ssh worker01. You should be able to do this without being prompted for a password. If you have trouble with this part, just generate the key on your Master, and open the .ssh folder and edit the id_rsa.pub file. Copy and paste the contents to the same file on the both worker nodes.
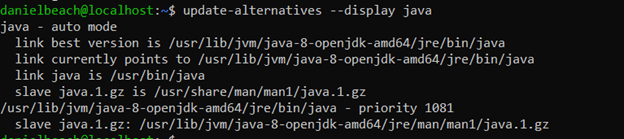
Next we need to set Java’s path for Hadoop. You need to find the current link, called “link currently” below. Once you have the current link it goes into a file called ~/hadoop/etc/hadoop/hadoop-env.sh

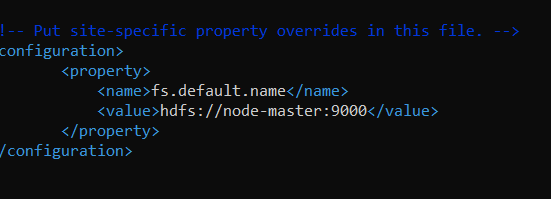
Setting the the location for the master-node is important, we do this by editing ~/hadoop/etc/hadoop/core-site.xml
Remember what I said about naming conventions and paying attention? Don’t call your master “node-master” in this file unless that is the name you used for your master in the .hosts file.
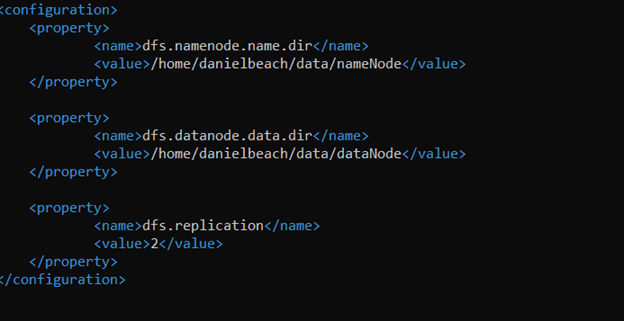
Set the path for the HDFS file system , editing the file ~/hadoop/etc/hadoop/hdfs-site.xml
Remember to place the correct location here, Hadoop in my case is installed in the danielbeach users’ directory, hence you would change yours to match your install location. Note the replication value, this should not be larger than the number of worker nodes you have. It’s basically how many nodes your data should be spread over. Seems like 2-3 is typical.
Next we need to setup YARN as the resource scheduler. Make a copy of the template configuration file, this is how we set YARN to be default.
cd ~/hadoop/etc/hadoop
mv mapred-site.xml.template mapred-site.xml
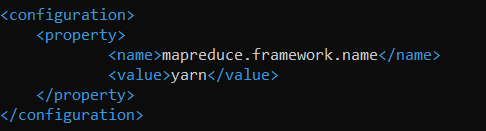
We configure YARN as follows … ~/hadoop/etc/hadoop/yarn-site.xml
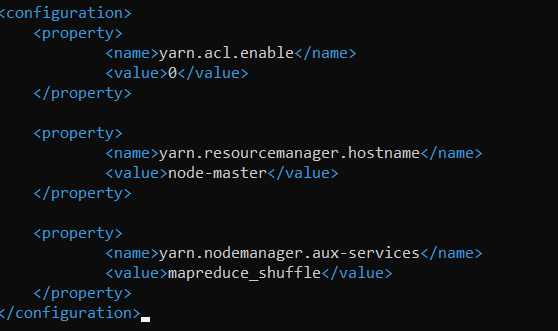
Now we configure the workers by editing the ~/hadoop/etc/hadoop/slaves.
Note that adding localhost here is going to cause my master to act as a data node as well.

The next task is to configure the memory allocation on the nodes. The resources for a Hadoop job run in something they call a container, managed by YARN, so controlling CPU, RAM etc by container, and having those settings match the size of your nodes is important.
First, we need to come up with a number of max RAM we want YARN to be able to use on a node. We have to leave room for the operating system of course. This is trickier in my example because I’m using Linode Nanodes, which are tiny, and the default configs are no good for machines with less than 8GB ram. My Nanodes are 1GB RAM, 1 CPU and 25 GB SSD.
I’m going to use the 80/20 rule, I will leave 20% of Operating System, the rest for the Hadoop containers.
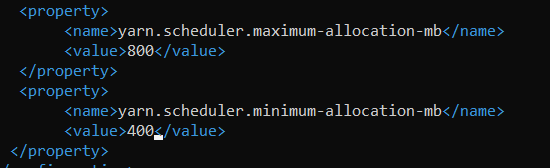
The configuration is done inside ~/hadoop/etc/hadoop/yarn-site.xml

The next memory configuration is the max/min memory allocation to a container, so how many containers do we want on the node? 2. So divide 800/2 = 400 MB will be the minimum container size. Obviously the max container size can’t be more than the max memory-mb.
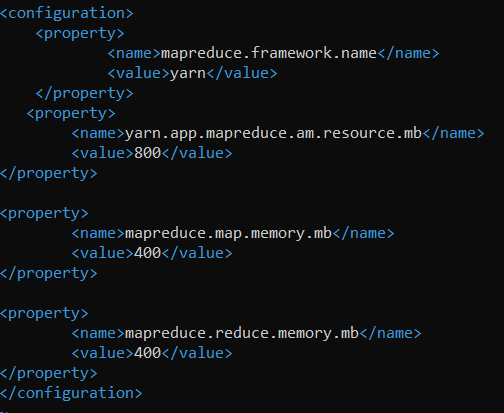
Next we have to configure the MapReduce memory settings for those jobs when they run. ~/hadoop/etc/hadoop/mapred-site.xml
This would be inside the containers we previously configured, so keep that in mind.
We want to configure the total memory resource allocated to a MapReduce job inside a container to be 800 to match our container max, and give the Map and the Reduce portions equal pieces of that 800.
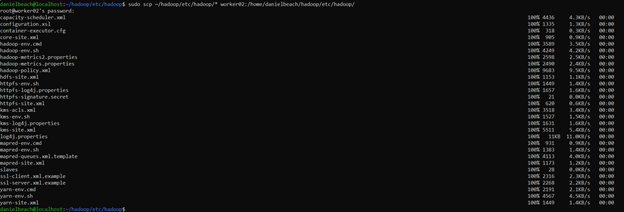
Now that we are done with all the configurations, lets copy them all from master to worker nodes.
sudo scp ~/hadoop/etc/hadoop/* worker02:/home/danielbeach/hadoop/etc/hadoop/
Last but not least for the configs, add Hadoop to .profile path of install.

Finally we need to format HDFS.
hdfs namenode -format
If you get errors for hdfs or Hadoop not found, it’s because the bash can’t find the install location. It means the path you put in .profile or .bashrc file is incorrect. Find the correct path by working your way up the install path and typing bin/Hadoop. Once you get a response, then you’ve found it. Don’t forget to Source or restart your bash session to get the changes to take effect.
This command will start Hadoop , run from master.
start-dfs.sh
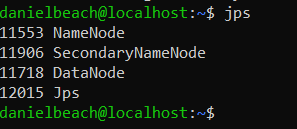
Also running JPS will list the services that should be running on the node.
Running JPS on master gave the following.
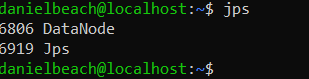
On worker01
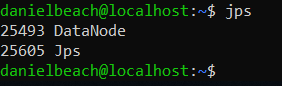
On worker02
One of the first things to run is hdfs dfsadmin –report , to see whats happening on the Cluster. I noticed something wrong right away. The only datanode up was my local master machine.
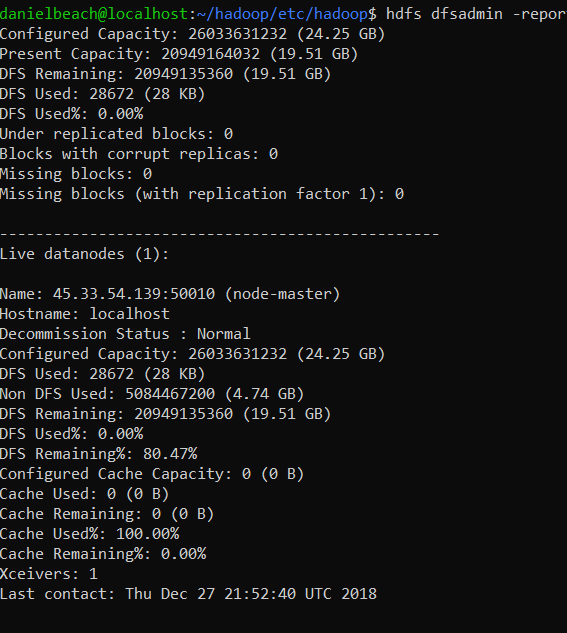
I figured this has something to do with the communication between the master and workers. Based on past experience I went to the workers and checked the firewall. Well the default deny incoming would be a problem.

sudo ufw allow from XXX.XXX.XXX.XXX
After fixing this, things looked much better, all my data nodes showed up.

That’s it. I tested setting up some directories and writing files into my new HDFS file system, worked like a charm. I’m looking forward to using Spark in the future on top of HDFS, should be a match made in heaven!